


Creating Forms in Microsoft Word
- Conor Jordan
- Sep 16, 2021
- 2 min read


Creating a Form
Forms can be created in a document allowing other users to fill in their details. A range of different fields in a form can be used such as checkboxes, text fields and drop-down menus. Many elements of a form can provide other users with a means to enter personal details. This is useful as it allows the collection of data for the creator of the form. Settings can be applied to allow only the creator of the form to edit the structure of the form.
1. Open a new document
2. On the File tab select Options
3. Click Customize Ribbon
4. In the list of Main Tabs check Developer
5. Click OK

6. Create the following form:

7. On the Developer tab in the Controls group click on Legacy Tools

8. Choose Text Form Field for the name field
9. A text field is entered into the form
10. After the Yes and No insert a Check Box Form Field
11. After Course insert a Drop-Down Form Field
12. Right-click on the Drop-Down Form Field and choose Properties
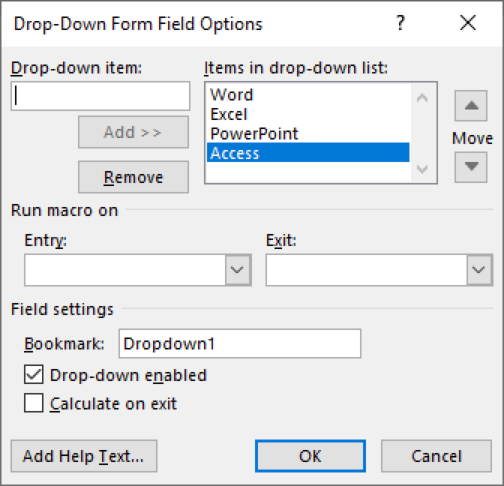
13. In the Drop-Down Item text box, type in “Word”
14. Click the Add button
15. Type in “Excel” “PowerPoint” and “Access” to include as Items in the drop-down list
16. Click OK
17. Save the document as “Form”
Protecting Forms
Forms can be protected so certain parts of the form cannot be changed e.g. the first name label. This is useful if users want other people to fill in forms without changing the form itself.
1. Open the “Form” document
2. On the Developer tab in the Protect group, click on Restrict Editing

3. On the Restrict Editing pane select the Allow Only This Type of Editing in the Document checkbox
4. In the drop-down menu beneath, choose Filling in Forms
5. Click on the Yes, Start Enforcing Protection button
6. Fill in your details in the form
7. Save the document and try editing any of the text labels. Notice how you can only edit the form fields rather than the labels
To learn more Advanced Word features, click on the image below:


Comments